Wednesday, December 24, 2014

*Simply Beautiful Christmas*

This years theme was Simply Beautiful. Although this Christmas we didn't have a place of our own to decorate, I still wanted to make it our own Christmas. Therefore, we were able to craft, and make things simple yet beautiful for our enjoyment. Don't let your home situation stop you from owning the holidays.  
 
Collage4

A look back on all the holiday craft and ideas this Christmas
 
 My little man and I had so much fun making these two crafts together. He felt so involved and we bonded.


052edited


009


 Easiest and cheapest Christmas Wreath ever!


070


 These I made for friends, nail polish for the girls and socks for the boys.
 
Collage

 My friends and Neighbors loved this healthy Christmas Treat
 
050

My favorite Christmas Gift Wrapping yet!
 
10


And there you have it, I had so much fun making the little details. These are the things that control freaks such as myself, enjoy and are must haves.
 
Collage4
 
Thank you so much for visiting with me this year 2014, where did the year go? I appreciate everyone of my readers and followers. Thank you!
 
**Merry Christmas**
 
015
 
Claudia H

Tuesday, December 23, 2014

Gifts: For Your Mistletoes

Ok, sometimes it's hard to get everything done and ready for Christmas, here are a couple of ideas on quick and creative last minute gifts, or stocking stuffers.


028

For the girls

032


036

 For the boys!
 
012
 
010

 Very quick and simple. They will love it!
 
Collage

Thanks for stopping by today!

Claudia H

Friday, December 19, 2014

Wrapping Gifts The Simple Way

Gift Wrapping is probably one of my favorite things to do during Christmas, making things look beautiful is my passion, and I happen to have the patience for such a sport.
 
 Being an elf is a lot of work, but oh so fun! All the paper, and the ribbons, and the colors! I absolutely have so much fun with this activity. It was all so easy, honestly I just went to the dollar store, and found this simple brown paper and white paper. The ribbons on the other hand were a bit pricier, luckily my mother had a great collection of them, so I didn't have to spend too much.
 
10
 
I used the Classic Red and White. It's TIMELESS!
 
2
 
What's more beautiful than a natural and organic look, achieved with brown paper and twine. It gives me a Regency period feel.
 
12
 
A punch of green is just perfect to give it an organic look.
 
9

Cohesive? Dare I say yes!
 
14

I know it's not about the "Presents" but rather about His "Presence", however, I just adore the way they look underneath the Christmas Tree.
Simply Beautiful!
 
15
 
13

How do you gift wrap for Christmas?

Thanks for stopping by today

Claudia H

Wednesday, December 17, 2014

Gifts: Clementine Mini Wreaths

Keeping with the Simply Natural Christmas theme I am following this year, I decided to make simply cute mini Clementine Wreaths, (can you tell I am addicted to making wreaths?)  to give away to our friends and neighbors. Not only is this a natural gift, but very calorie friendly. Seriously healthy!


050

Oh so fun! And oh so easy! Normally I would have used twine to tie up the clementines, however I couldn't find any twine this year, (perhaps I should have looked harder) so I used a thinner type of "indoor twine", not my favorite string yet, very slippery and not so easy to work with, but the color was just right.
 
028
 

Still, they looked so great! Everyone loved them, I made a few batches of these.

048
 
 
They were so cute and festive that I wanted to keep them for myself.
 
005


050

What treats have you made for your friends and neighbors this year?

Thank you so much for stopping by today!


Claudia H
 

Monday, December 15, 2014

Tis The Season to be Crafty DIY: Cotton Ball Wreath


This year I really felt like having a simply beautiful and natural Christmas. Therefore the color scheme had to be less formal, and more natural.  From the décor, to the Christmas cards, to the gift wrapping (coming soon). So I decided to use some natural elements to make a pretty simple wreath.
 
This was the easiest and simplest project I have ever made. Cotton balls, wreath, pick your favorite ribbon, and voila! Total cost for this project $2.50
 
073
 
 
076
 
 
I really like the simplicity of this wreath, the cotton looks like snowballs, and the beautiful stripped ribbon gives it the perfect touch of Christmas.
 
070
 
065
 
Thank you for stopping by today!
 

Saturday, December 13, 2014

Tis The Season to be Crafty DIY: Pom Pom Ornaments

This was such a fun craft, perfect for the little ones. They always want to help you make things. Seriously so easy! The hardest part was cutting out the shapes. Other than that, it was a blast!
 
IMG_3346

 
009
 
 
005


Our cute souvenir for Christmas 2014
 
006


Thanks for stopping by!


Saturday, December 6, 2014

Tis The Season to be Crafty DIY: Hand Wreath

Hello All, I know I have been gone. A lot of stuff has been happening, busy with work, pre-school, travelling, moving! Ah too much to tell. As of right now I am so happy and blessed to announce that we are expecting our second babe! Due in March 2015, we couldn't be more happy about this. We made a temporary move, currently living with the parents, call me crazy I know!! But sometimes we have to make some slight adjustments to settle down. Getting ready to move out of state next year, and well crazy life just gets in the way.

Actually, this Christmas season has made me so crafty, not to mention this belly, I am in the nesting and crafting mood every single day of my life. Since it's Christmas in about 19 days! Ahh can you believe it? I wanted to share a super cute kid craft we had so much fun making. Super easy for the kiddos, and so sweet too! Check it out!

Saw this on Pintrest and immediately got supplies and started working on this.

055edited


So easy and oh so fun, especially for my little handsome hands!


IMG_3453


On the back we used regular clear tape, why? because my little man loves to help, and it made it so easy and fun for him to tape all the cute little hands together001

We used regular cardstock for the hands and circles

002
 
Used a silky red ribbon, and voila!
Now we will always keep this, to remind us, and little man, of the size of his hands Christmas 2014
 
052edited
 
I love our cute little Hand Wreath
 
 
055edited
 
I will be working on many Christmas projects, stay tuned for more fun crafts and ideas.
 
Thanks for stopping by


Monday, June 2, 2014

Nolan's Pirate Party / My Party Planning Secrets

Ahoy Mates!
Over the weekend, we had a most anticipated party of the year. Nolan's Pirate Birthday Party. I have been planning this for over a year. I think it was a huge success, it was so fun! And most importantly, Nolan had a blast! He is such a spoiled little buccaneer. Today, I am going to share some of my party planning tips and secrets, to a grand party celebration splurge, on a very small budget.

First of all, I like to plan the theme a year in advance, since my toddler loves a lot of things, it's easy for us to pick out a theme, and keep him interested in that theme. This makes it easier to shop for the specific theme.
 
photo
 
 I plan all my birthday parties a year in advance. How do I manage to pull everything off on a tight and strict budget? Easy, I start purchasing throughout the year, anything on clearance, dollar rack, store, etc. it's all I ever purchase. It would appear as though I have money to spare and splurge, honestly I don't.
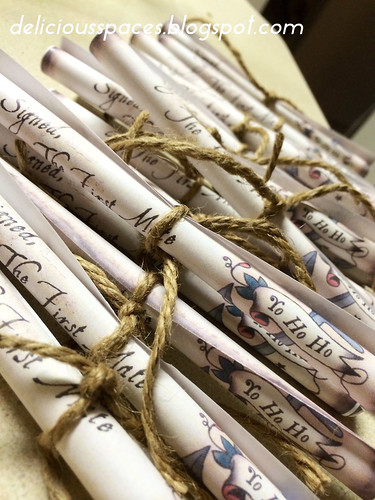
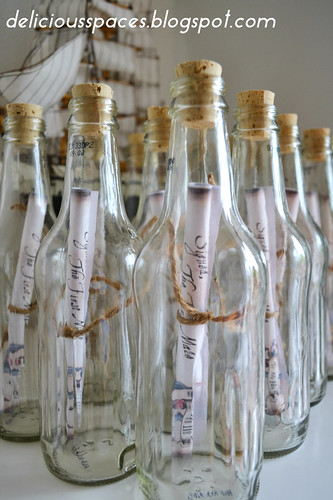
 For example, invitations such as these would cost me about 3 dollars each to purchase at the craft store, in mini. I made them for about 0.75 cents a piece. Soda bottles, free, I saved them from soda we got months and months ago! I just bought the corks, with a coupon from the craft store they ended up being about 0.25 cents each. I printed invites at the paper store, 0.50 cents each, more than I wanted to spend, but had to splurge for the color. Not to mention my hubs company discount also helped (unless your printer is up and running, unlike mine)
I absolutely love the way they turned out!

08
 
 
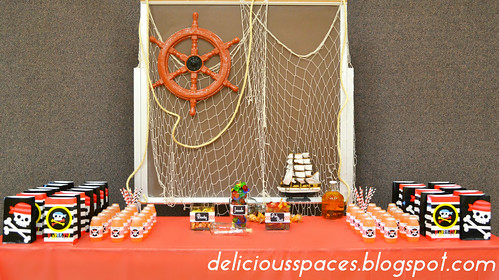
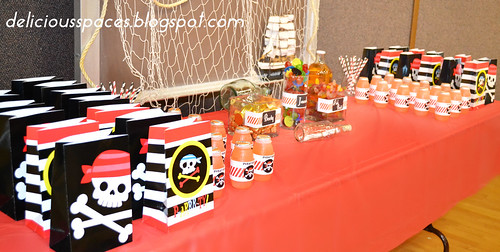
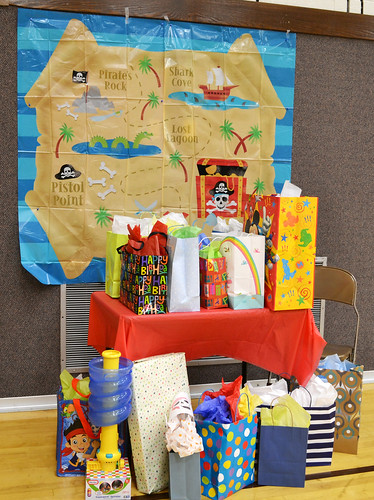
All décor you see here, purchased months in advance, the most expensive thing here is the cool Ship steering wheel, about $4 at the party store.
 
008
 
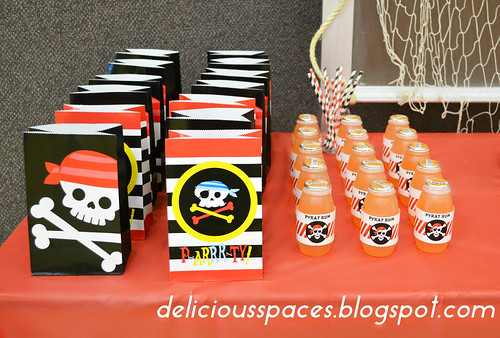
Cute favor bags, bought months in advance.
(Originally wanted to do wooden treasure chests for each of the kids, but the list kept growing and growing, at $1 each, not too bad, perhaps I would have done it, if I didn't have 25+ kids coming.)
 
035
 
Pyrat Rum labels, FREE! Click here for the website. I modified the labels just a little bit. Straws on sale at Craft store, last year!
 
006
 
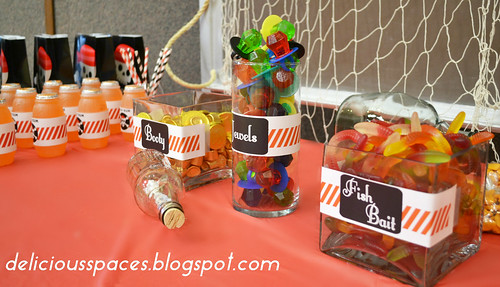
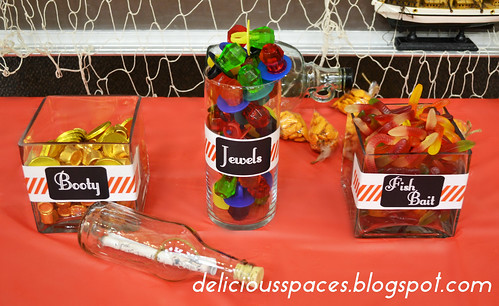
This year I decided to have a mini candy buffet.
Again, these are the same labels used for the rum, tweaked by me.
 
004
 
003
 
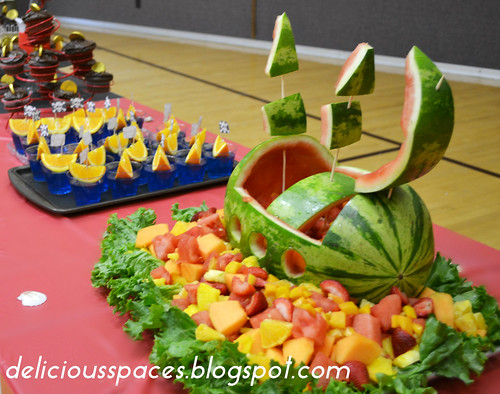
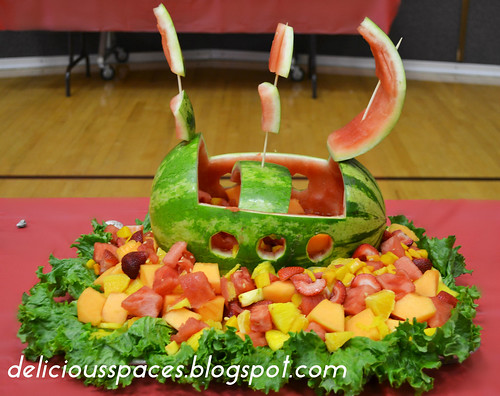
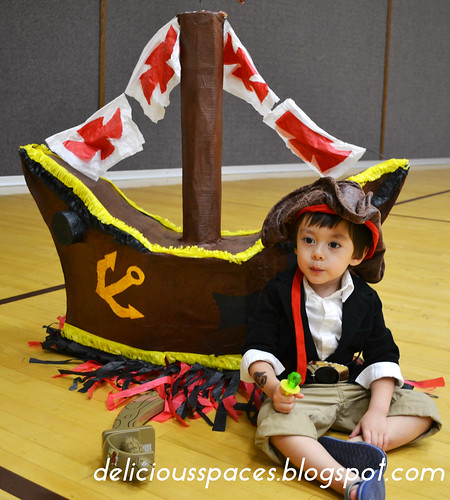
My mother went all out, and made us a Pirate Ship.
Didn't she do a great job?
 
009
 
AMAZING!
 
010
 
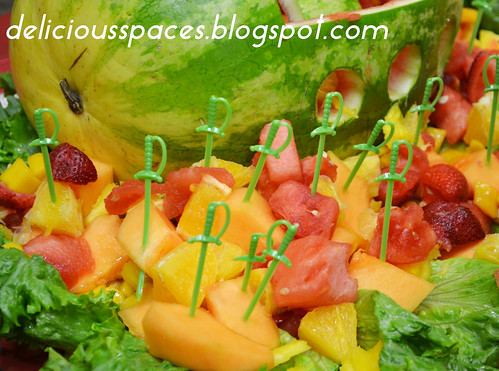
Love the toothpick swords, fits the theme so well! As usual, she doesn't ever forget the details.
 
037
 
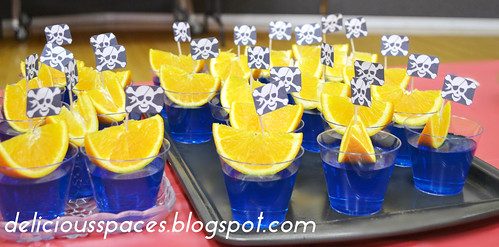
I just had to have these jello treats.
The kids loved them, the jello was so yummy!
Printed these little skull figures from the same website above, and tweaked them.
 
012
 
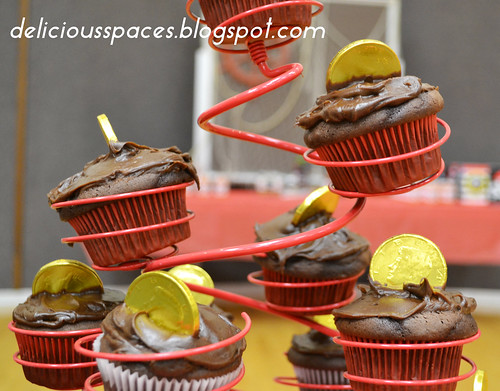
Ok, super cool cupcakes!
Doesn't it look like booty buried in mud?
 
013
 
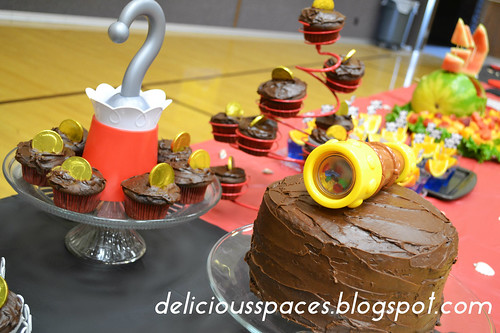
Desserts, compliments of Debbie.
(Cool Desert décor, compliments of Nolan)
 
016
 
Ding Dong Cake, my mother-in-law's specialty. Again, super simple, but just right!
 
014
 
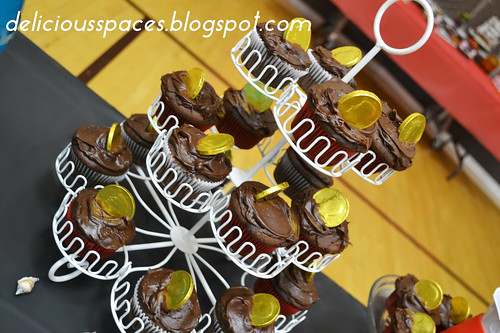
Love the way these cupcakes turned out!
 
015
 
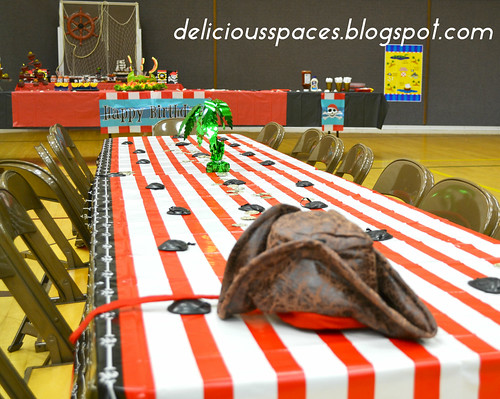
A table for the children, eye patches and all!
Got these super adorable table clothes on sale, at Target, from last years collection. Dirt Cheap, no joke!
 
018
 
And of course, a ship-wreck Piñata!
This was seriously the biggest Piñata I have ever seen.
(Mexican Store)
FYI: if when looking for a piñata for your party, as you may know, the price tag is on the high end when you go to your local department stores, so don't be afraid to check your local Mexican store, the piñatas there are more traditional, and bigger, and half the price you would pay at the department store.
This year we decided to fill up with Toys, got a bunch of Pirate theme toys at the dollar store, yo ho ho! The kids were so surprised.
 
090
 
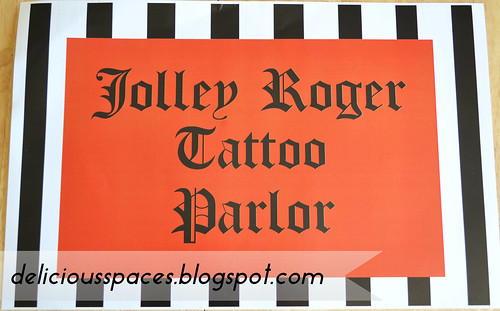
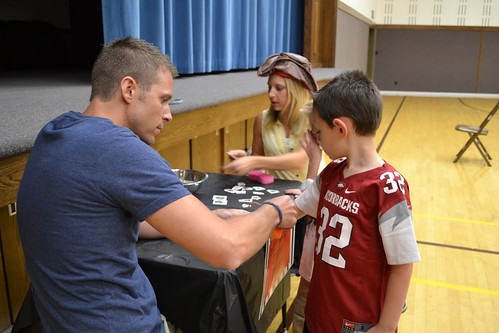
We even had a Tattoo Parlor for the kids
(A lot of these signs, I created myself, than printed for a pretty penny, and discount).
 
002
 
Compliments of the cool Jolley Roger Tattoo Artists,
A special thanks to Heidi and Ryan
 
044
 
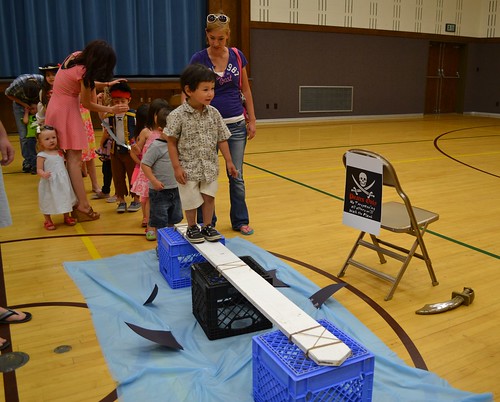
Pirates only! All others had to walk the plank...above Shark infested Waters...
(Seriously all dollar store for the plank supplies, except the plank, old neighbors picket fence spare)

068
 
Thank you for all the cool gifts!
086
 
If you want to throw a big birthday party, but don't want to spend the money, just remember, plan a year in advance, throughout the year, shop, shop shop! Get everything on sale, clearance, dollar, last years collections, don't buy all at once, so you don't feel it too rough on your pocketbook. Also, set a budget, and stick to it! Our budget for everything, food included, was less than $200.00. Stick to the plan, and be ready to DIY. A lot of this stuff took a lot of mind planning, but also a lot of labor of love. If you enjoy doing it all, or have a strict budget, prepare to do it yourself a lot, and don't forget to have lots of patience.
Well, that's all for today, I hope you all took a little something from my little secrets to creating a successful theme birthday party on a budget.
 
Thank you for stopping by
xoxo