Showing posts with label Cheap design ideas. Show all posts

Saturday, May 18, 2013

Little Bargain Big Uplift

Well, it has been far too long since I have posted anything on the blog. Please excuse my negligence friends, to be honest our trip to Mexico really took it out on me, and it has been way too busy since we got back. So many activities going on, summer is about to start, mommy business keeps me busy, as well as my job. I have come to a decision, no I am not going to stop blogging 100%, but I am going to be blogging less, meaning, you won't hear from me every week like you used to. In all honesty, blogging is way time consuming, not only that, but keeping up with projects, and updating our home has become way expensive. Yes, it is fun, wonderful, uplifting, and way cool. But lets face it, I cannot compete with those other mommy bloggers, we are such a young couple just getting started, we haven't the means or time to keep blogging. I will however, be soo happy to post about our latest updates, and projects.

I won't leave all the way, and I do appreciate all the love and support I do receive from my followers, and friends. You guys are all so awesome! It has been a long time since I posted anything, let make a quick post, of course it's a work in progress, and it will always be. Here is a super cool and happy thing I am working on, I have been meaning to post for a little bit, but haven't had the time. I am finally going to post.

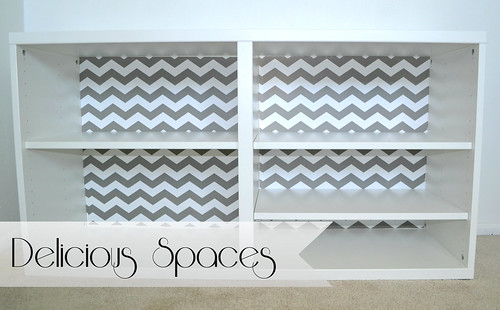
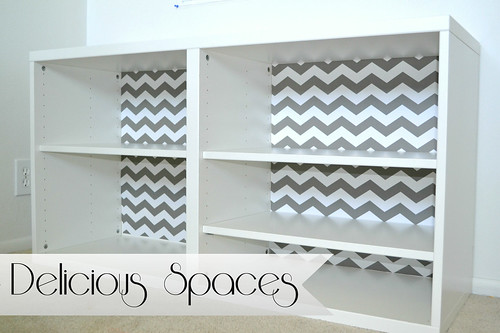
I have been wanting to buy this super cute storage organizer for Nolan's room, well we finally found it, for a great bargain, original price $75, go it for...


We love scoring!!!!
 
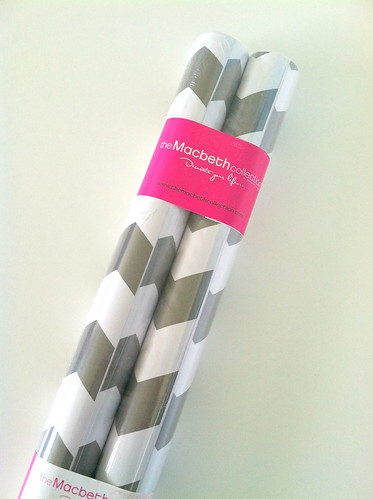
Got some super cute shelf liner paper from TJ Maxx
 
photo 5
 
Tada!!
 
001

003

Before
 
 
After
 
001

Much better! What do you think? I think it's a pretty dramatic and unique look. So much room for beautifying. Can't wait to style it up ready for Nolan.

I am not finished yet! Styling coming up soon. Stay tuned!
 
xoxo


Wednesday, March 6, 2013

Window Treatment Update, finally!

Hi and good day! Ok, today i'm super excited, i am especially giddy about this post, because not only did i work hard on this, well not too hard actually, but i just love the transformation. i have been obsessed with roman shades for quite sometime, especially bamboo shades. They're coastal, relaxed, super casual, and they add special interest, texture, and character to a window treatment. i have been wanting to get these shades for quite sometime, frankly they were a bit on the high end for me, i know they're not too expensive, but for my budget they were. i have been wanting these shades, forever!!!


i just had to deal with some ugly regular blinds, well, they came with the rental, and i was grateful to have had blinds, but Nolan kept breaking them, and that cord was a hazard. So i always kept them up, just to give me the satisfaction of the blinds being up, just like roman shades go. This is what my poor windows looked like, because the blinds were so not cool, the awesome curtains i picked up a couple months ago, the blinds would not give my gorgeous curtains justice.


Poor Sad Windows


so i went to my momma's house yesterday, because she told me she picked some bamboo shades at the DI (good will) i went to go measure them to see if they would fit, sure enough, they were just perfect!!!


Amazing!!! It was a dream come true!


Now, because the shades didn't come with instructions, luckily the hardware came with it, i didn't know how, or even had a clue on how to install these babies. i am so grateful for youtube and awesome smart window folk, i followed these super easy, and quick instructions on how to install these shades. Depending on what you want, outside or inside installation instructions, here is a quick link for both.

Click on Inside Mount to learn how i installed mine.

Click on Outside Mount to learn how to install.
 
It was sooooo easy! Look how wonderful they turned out!!
 
 
I adore them!!!


The sweetest part of this project, was that it was absolutely and completely FREE!!!
Thanks to my momma!
 
 
Thanks for stopping by friends!
 
xoxo


Thursday, January 31, 2013

DIY: Paint Swatches for Valentines Day Gifts

Oh what a beautiful Friday it is today! Who is ready for the weekend? i used to always look forward to the weekends, because it all started on Friday's for me. Since i started working from home, it feels like my weekends start on Monday's. Seeing that i work on the weekends from home, it has turned my world upside down. But i love it, i love my job.

So can you believe Valentine's day is just in a couple of weeks? Boy, time is flying this year. Since Valentine's day is just around the corner, today i wanted to show you a little project i worked on over (my weekend) it's super simple, and cute. All i used was, paint swatches, i have tons, a heart shape puncher, which you can get in any craft store, i used my coupon so i got it for 50% off! yay!! And a simple frame, got mine at IKEA.


My little Handsome Man loves this puncher


Ta Da!


What do you think? It's quick, it's simple, and so cute. I made one for each of my sister's. I love V-day. The decorations and colors are sooo girly, and sooo sweet! 
 
I love using paint swatches, as you can tell, i have used them for various things, hehe.
 
Thanks for stopping by, and have a terrific weekend!
 
xoxo
 

Wednesday, January 23, 2013

Last Day To Enter GIVEAWAY Inspiration

 
It's Wednesday, today is the last day to Enter the GIVEAWAY!!! If you cannot figure out how to enter the GIVEAWAY, makesure you become a follower. If you are on an Iphone and cannot figure it out, scroll to the bottom of your screen by the HOME button and click on {View Web Version} Once off the Mobile Version you will be able to see the followers button to your right, and become a follower. Next leave a comment, if it will not allow you to leave comments, leave a comment as anonymous.
 
 
If you cannot think of any reason to enter the GIVEAWAY, and win this gorgeous adhesive paper by MacBeth Collections, here are a few good reasons as to why you should enter the GIVEAWAY. Welcome to Inspiration Wednesday.
 
 
Why not give that dated, and unwanted headboard a makeover, by giving it a fresh cover up.
 
.
 
Cover the back of a beautiful display cabinet.


Why didn't I think of this? Use it on your wall and give it a unique trim.


Or freshen up your closet, this closet looks gorgeous in this pattern. sigh..
 
 
How about turning an old cookie sheet into a luxurious Tray?
 
 
Ok, I am in heaven every time I see this gorgeous idea, not only are they using decorative paper on the cabinet door, but the cute tray is both functional, and fun!
 
 
Use it on your grandmothers antique piece, with a fresh coat of
 paint and some cute backdrop paper, it will liven up your space.
 
 
Or your daughter's IKEA closet. See what a unique piece it turns it into?
 
 
How about covering the inside of your drawers? Just the right pop of color to brighten up your day at the office, or in the kitchen.
 
 
Top it all off with a new look for your beside table, coffee table, or any type of table. Isn't this idea darling?
 
 
The possiblities are endless!! I hope you all get a chance to enter the GIVEAWAY!! You have till tonight midnight to enter. Good luck, and have fun!
 
To Enter the GIVEAWAY, click HERE!
 
Love all my followers, and new followers.
 
xoxo


Tuesday, November 20, 2012

Banana Bread Recipe + DIY Ornament Ideas

Oh my gosh! Thanksgiving is in two days! Can you believe it?? I haven't decorated, and I've nothing Autummy to show, there is a reason why. We are moving!! Yes we are moving, AGAIN. I hate packing, carrying, making all the trips, re-organizing, re-arranging, etc. In the middle of the holidays!!
Fortunately, we aren't moving too far. As I have mentioned before, we reside in a basement apartment. So, we are moving upstairs! Yay!! More space, more light, and the trips upstairs won't be too bad. We are super stoked, our move will be in mid December. That is why I haven't particularly been showing any pictures of my Christmas decor. First of all we are moving, and second of all, there is no point in decorating if I'm going to have to move them again in a couple of weeks. So that is why we haven't decorated for Christmas, sad! But we will have our Christmas tree put up in no time, and since we are getting a new tree, we couldn't be more happy and excited.

My post today consists of the easiest and yummiest Banan Bread recipe ever! And ideas on DIY ornaments. I have been seeing so many fun ideas out there, I want to share some. All these bloggers are putting up their Christmas trees and making their own ornaments, makes me want to do it so badly! But I won't be able to do too much this year, it's ok, next year will be amazing!

Banana Bread for Thanksgiving anyone? Click on the picture to learn how to make. Super easy, super fun!

 
 DIY: Ornament Galore

 
Source
 
Source
Source
Source
Source
Source

Source


Thank you so much for visiting today! I hope you all have a wonderful Thanksgiving with all of your loved ones. Many blessings to all.

XoXo


Friday, October 26, 2012

DIY: Sunburst Mirror

Oh wow!! It has been far too long since I have blogged. So much has been going on lately. I am so sorry for neglecting you my followers! I'm back, and ready for lots more fun posts, I promise! My little man got Roseola last weekend, and he was sick for a whole week. Being a mother is tough, it is so worrysome and exhausting, and just plain hard. But he's up running around, and so is mommy. Over the weekend, we had some very special guests. But more on that later. I have finally finished my forever neglected project.

Remember this?


Ok, remember I told you I really wanted a sunburst mirror? Ok, well I decided to go for the most inexpensive idea. I didn't want to invest a lot, since I wasn't really sure if I loved a sunburst touch as much as I thought I would. So I went for skewers! At 0.97$ for 100ct. Not too shabby


Took my old mirror I was once using above my bed, got it at homegoods for $3.50
 

Coved the center mirror to protect from glue and paint


Hot glue works just great!


Got some hanging hooks from the craft store for $3.99
Glued it on the back of the mirror with EZ-6000 super glue. It works on anything and everything! Craft store $4.99
 

Gray primer paint for $3.99 hardware store


Spray away! Let dry, and continue to as many coats as you need until satisfied. I did 3 coats


Voila!


Not too bad for my first time, I gotta tell you, it was a little frustrating. Gluing all of these skewers one by one was the most time consuming step. It's all downhill after that. It took me a couple of days to finish it all. With lots of 2 hour breaks haha. I used about 220 skewers, so I bought way too many, but it's ok, now I have extra skewers for a fun shiskabob party for the summer.
 
What fun projects have you been up to? Please share!
 

XoXo